Raspberry Pi Open Frameworks Demo

Uncategorized — Dan Russo @ 11:56 am

RasPI GPIO Demo from Dan Russo on Vimeo.

This example demonstrates the use of physical input (GPIO pins) to activate an on screen graphic response.  All of the computation is completed by the raspberry pi, which is utilizing open frameworks to generate the graphics and access the digital read pins.  There are 3 buttons (momentary) that each activate a different geometry.  The buttons can be activated separately or in various combinations to alter the graphic.

This was my first experience using raspberry pi and open frameworks, as well as any programing interface that uses true C++.  One of the most crucial things I learned while working through this demo, was the process of coding and compiling C++.  Learning the role of the uncompiled file structure was a rewarding experience that allowed a closer look into how the programming language utilizes memory allocation.  The use of the Raspberry Pi’s GPIO pins was also a crucial learning portion of the demo.  The GPIO interface of the Raspberry Pi differ’s from other micro controllers in some ways, so dealing with a more complex process provided a better look into wiring switches and sensors to digital read inputs.

ofx_d1

ofx_d2

Ping Pong Raspberry Pi

Uncategorized — amyfried @ 3:11 pm

photo

1 2

Concept: The main concept was to create a ping pong game using openFrameworks, raspberry pi, and 3 inputs from sensors or buttons.

Process: I began with using one button to change the color of an ellipse from red to green when pushed. Next I added in a rectangle to move up and down when the button is pressed, I also changed the code of the ellipse to add speed to its x and y directions. When the ellipse hits the edges of the preset window it bounces off at an angle. When I got that to run I added a second button and another rectangle to be moved up and down by the push of the button. Finally I attached a potentiometer to increase the ellipses speed when the potentiometer is moved (digitalWrite set on HIGH).

Lessons Learned: This was my first time working with a raspberry pi, and openFrameworks. I have been familiar with Arduino, and Processing 2.0, but it was a new experience to work in openFrameworks which allows to work in unison the elements of the other programs. In order for me to understand openFrameworks I went step by step to add elements to the program to expand upon. In processing I would be able to make a rectangle in Center Mode, but errors kept occurring so I couldnt utilize this in openFrameworks. Next I tried to create collisions by determining the distance between the center of the ellipse and the length of the pong paddles. In Processing 2.0 I would just use dist() to determine this number, but in openFrameworks I had trouble using this command to work for me. I also found out that to create collisions one should use the gravity tool, but I couldnt figure out how to use this function also.

Homemade Microphones and Pickups Workshops

Uncategorized — Jakob Marsico @ 10:43 pm

Local musician and analog electronics guru Michael Johnsen will be teaching a series of workshop on homemade microphones at the Pittsburgh Center for the Arts (nearby in Shadyside). Here is a link to more information about the class. If you can fit it into your schedule, I highly recommend you consider taking this non-CMU course.

mics flyer_2014 fall

Flicker Deck

Uncategorized — rbrill @ 11:37 am

Flicker Deck Demonstration from Ryan B. on Vimeo.


About

Skateboarding is fun, but participating in the sport comes with a good deal of risk. The biggest dangers are uneven pavement and passing cars. Uneven and cracked pavement reduces the control of skateboarders and can cause crashes in cases of extreme speed and very poor asphalt. Cars often do not see skateboarders or do not know how much space to give them.

Flicker Deck highlights rough pavement as a skateboarder passes over it. LEDs provide a visual indicator of rough pavement to those riding behind the owner of a Flicker Deck and surrounding cars. This information lets other riders better plan their path downhill and lets nearby cars know that the skateboarder has less control and should be given more attention or a wider berth.

Flicker Deck users a small microphone to translate the vibrations created by riding over rough pavement to red light. I chose red light for this project because it mimics the behavior of car brake lights and can take advantage of an already existing mental model. Drivers are trained to slow down when they see red brake lights suddenly brighten in front of them

Inspiration
Flicker Deck was inspired by Project Aura, a bike light that illuminates wheels based on the speed of the cyclist.

I was also interested in the idea of translating the micro-topography of our roads into another form of information. Long boarders gain a very intimate knowledge of the characteristics of the roads around them, and I like the idea of sharing that knowledge with others.

If I were going to extend this project, I would add a module that tracks and stores location and vibration data and use the information gathered over time to map pavement quality in an area. This information could be used by other long boarders to plan routes and by local governments to plan road maintenance.

How it Works

A protective case secured to the bottom of the deck houses a microprocessor, a 9V battery and microphone. The microphone is secured behind a small hole cut in the side of the case. This hold provides clearer input for the microphone and lets it pick up the noise made by passing cars.

The microprocessor takes the amplitude of the sound picked up by the microphone and outputs a corresponding level of power to a string of LEDs that emerge from a small slot cut into the case and wrap around the bottom of the skateboard. By wrapping the LEDs around the trucks of the board I was able to get the translucent wheels to glow along with the ground.

SILO

Assignment,Project01,Submission — priyaganadas @ 12:47 am

SILO from Priya Ganadas on Vimeo.

SILO is a silent tracker which senses people walking by.

Goal– The idea of the project is to make people realize life beyond their own bubble, by grabbing their attention while they do a routine act such as walking from one building to another. SILO gets activated by footsteps and prints out messages that can be related to any situation. These messages add serendipity to everyday life. Little creatures hide inside SILO and appear to see the person who activated them. They go back in once SILO is finished giving out the message.

IMG_20140906_230444786

IMG-20140908-WA0002

IMG_0096

Technology– SILO has a thermal printer that prints out messages, Piezo sensor to detect footsteps, LEDs, Arduino, Speaker phone and Servo to activate the little creatures.

Sing To Me

Uncategorized — ygk @ 9:17 am

There is a common myth that plants will grow faster when you sing to them often. This flower guarantees you its blossom, that is if you are able to sing it the right song.

Well, luckily you get to pick that song. You can be that special person to make this flower blossom. You can put this flower next to other flowers so that you can get that instant blossom gratification from your beautiful singing efforts, and simultaneously test out that myth…I think my basil plant grew faster this week?

Project01: “isnOre” By Amy Friedman (2014)

Uncategorized — amyfried @ 6:36 am

isnOre from Amy Friedman on Vimeo.


IMG_1179 IMG_1175

photo 5

Concept:

I hate when someone is sleeping in the same room as me and snores. It gives me a headache, I cant sleep at all and I am always cranky the next day no matter what. isnOre is a device to detect snoring and inflicts disturbance to those who snore so they understand the impact it has upon others. Once isnOre detects snoring an alarm is set off and based on the origin of the noise, isnOre spins to face the device and sets off a water gun to spray the snorer and annoy them.

Process:

I began with figuring out my initial concept by looking at precedence and creating a blog of  “Precedent Analysis” of what the capabilities of a microphone input can be.  Then I chose to focus on snoring as it has always been an issue I have had when trying to sleep. From that point I began to look for what elements I needed to create the product and what the outputs should be to inflict pain/annoy snorers. I looked at dart guns, stun guns, shocks, water guns, and they came down to an alarm system that outputs a buzz. I then figured out the sequence of events and began to sketch out forms to maximize the effect and input of each sensor based on placement.

photo 1 photo 4

I created a cardboard prototype to understand the design better and used plans and sections to determine the dimensions of each element in the space. Next I created a 3D model of the design and used it to make a laser cutter file so I could utilize the laser cutter to cut acrylic.

Lessons learned:

I learned that a one week turn around time is hard to accomplish, but manageable as long as you dont attempt something that is too far out of reach to achieve. I learned that no matter how well designed the 3D model, and laser cutter file there will always need to be adjustments. I need to make sure to understand the cut of the laser better when putting pieces together. Using a microphone was a new experience for me and there are lots of manipulations that can be done using arduino and other programs that I want to explore and find out.

Breathe

Assignment,Project01 — Dan Russo @ 5:02 am
[vimeo 105531168 w=500&h=280]

Breathe was created to explore the dialog between people and their built environment.  The installation gives walls the ability to subtly communicate through the mimicked act of respiration.  The respiration creates an active dialog that changes with the character of the space. Breathe samples ambient sound levels and bases it’s rate of respiration on this data. High ambient sound levels lead to anxious tendencies of the wall panel, thus reflecting the living energy of a space.

Breathe_1


Breathe_2

Engage: Put Down Your Phone, Pick Up Conversation

Assignment,Project01,Submission — tdoyle @ 1:03 am

Without noticing, we interact with our phones all the time. Whether it’s a tweet mention, a text message, emails, or an app notification, we are constantly stepping out of the real world and into the digital world. In doing so, sometimes we lose meaningful interactions that we could have with the people that are actually around us. We see this in situations such as dinner where everyone pulls out their phone to fill time instead of sparking conversation. My goal was to create a device that encouraged us to unplug and engage with actual people instead of tweeting the day away.

(more…)

The Floor has a Voice

Assignment,Hardware,Project01,Software — Tags: — John Mars @ 12:58 am

I often find myself humming some made-up tune to the gentle whir of a room’s machinery in the background of my consciousness. What would happen if that whir became more pronounced, and the room started singing its own tune?

To accomplish this, I must do a few things:

1. Pick up the noise in a room with a microphone (the kind of which is undetermined)
2. Analyze the sound to determine the room’s base frequency. Continue analyzing that sound to determine if/when that frequency changes.
3. Create a never-ending tune from based upon the base frequency.
4. Send that tune into the room as unobtrusively as possible, to make it seem like the room itself is singing.

Mic

1. Pick up the noise in a room with a microphone (the kind of which is undetermined)

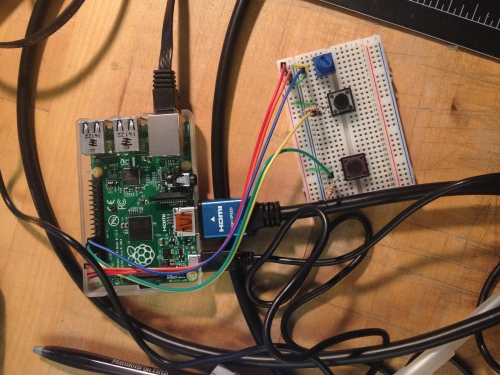
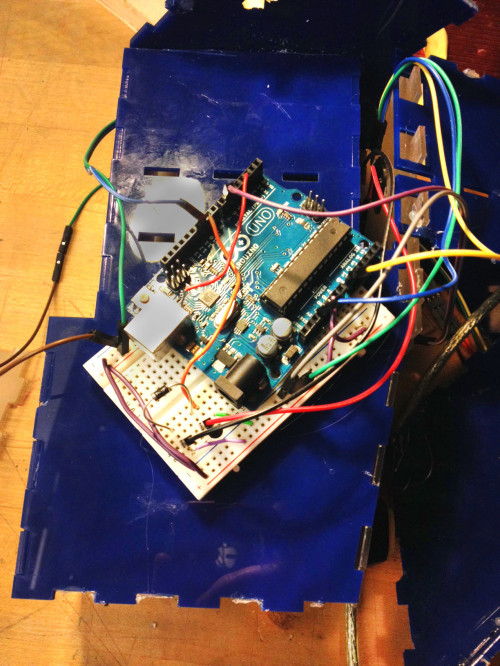
An [electret mic](https://en.wikipedia.org/wiki/Electret_microphone) is my microphone of choice in this case. The one I’m using from [Adafruit](https://www.adafruit.com/products/1063) is pretty good, and very easy to use. Sound has always been this mystical, mysterious thing, but over the past year or so, it’s all coming together – and it’s all a lot simpler than I was expecting.

2. Analyze the sound to determine the room’s base frequency. Continue analyzing that sound to determine if/when that frequency changes.

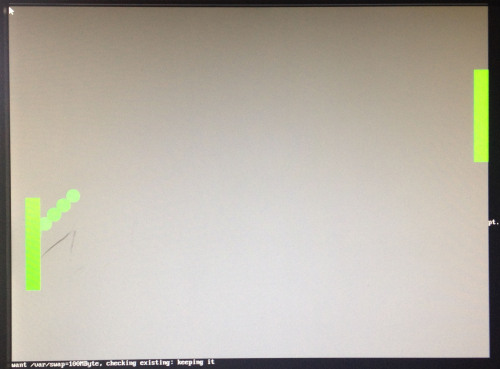
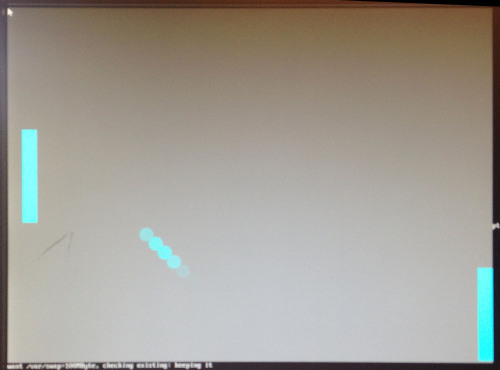
An FFT algorithm helps compute the amplitude of all frequencies of sound wave getting picked up by the microphone. The one I’m using splits the audible range into 64 bins of 75hz ranges each.

3. Create a never-ending tune from based upon the base frequency.

Via [OSC](https://en.wikipedia.org/wiki/Open_Sound_Control) I can send the FFT-derived base-frequency to a Raspberry Pi running [Pd-extended](http://puredata.info/downloads/pd-extended). With PD, tone generation is as simple as connecting a few nodes, and song generation is just a little bit more complicated than that.

A series of specific whole-number ratios multiplied by a frequency result in natural harmonies: for example, the base-frequency times five-fourths results in a Major Third above the base; fifteen-eights is a Major Seventh.

Using this knowledge in combination with a basic chord progression and a little randomness, I can create a never-ending song that perpetually realigns itself to the incoming frequency.

4. Send that tune into the room as unobtrusively as possible, to make it seem like the room itself is singing.

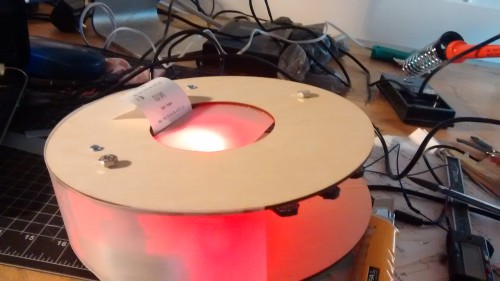
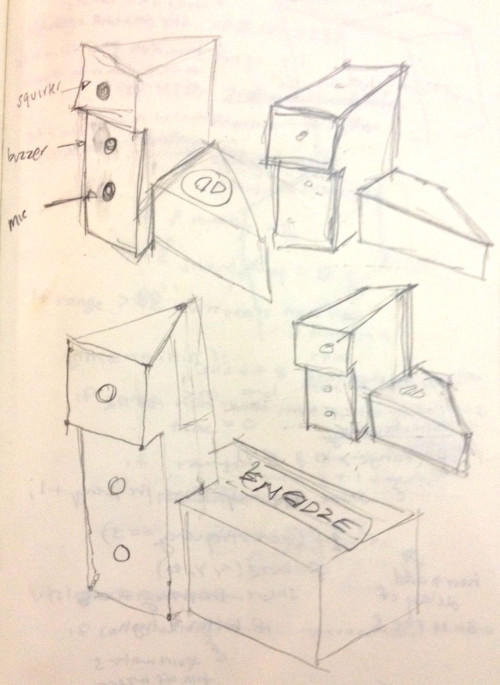
There isn’t much to show here, and that’s kind of the whole point. I’ve embedded my system into the ventilation vents in the floor below. A [surface transducer](https://www.adafruit.com/products/1784) (speaker without a cone) transfers the amplified music to highly reverberant metal air ducts.

Boards

Transducer

« Previous PageNext Page »
This work is licensed under a Creative Commons Attribution-Noncommercial-Share Alike 3.0 Unported License.
(c) 2024 Making Things Interactive | powered by WordPress with Barecity