The Teletickle

Final Project — alanhp @ 9:04 pm

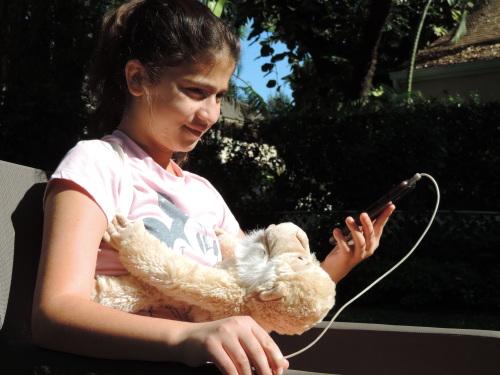
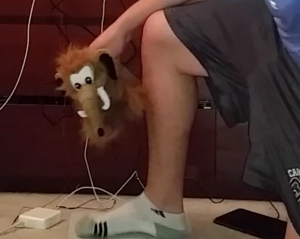
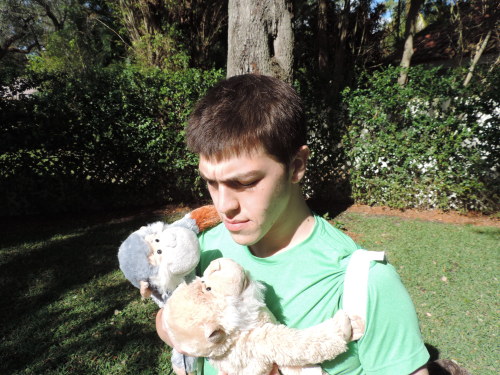
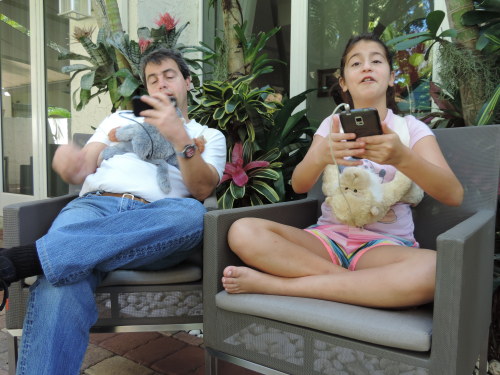
The Teletickle allows users to send and receive tickles using a custom web-app located at teletickle.com. Rather than sending and receiving texts, with the teletickle I wanted to enable users to send and receive a more sensorial and expressive message in the form of tickles. The system is meant to be experienced playfully, it is a device intended to make users laugh and enjoy the experience of being tickled and tickling. The monkeys in which the electronics are encolsed add to the playful and silly nature of the project which research has shown makes for a better tickling sensation. Further, the user who receives a tickle does not now when the motors that cause the tickling will be activated or which motors will be activated, the tickling is entirely controlled by the user that sends the tickle.

There is previous work done in this space, in particular this work took from the work of affective feedback done in the Human Computer-Interaction community en.wikipedia.org/wiki/Affective_haptics Specifically, the research findings that showed how the tickle is more effective when it is experienced randomly and when the design of the system is silly or humorous.

The project was built with a divide and conquer approach. Rather than trying to build the entire system, my approach was to build the pieces of the device and then connect them. There were two primary systems to build, the web application and the Arduino software to interpret audio signals. Each part of each of these systems was individually built, the design of the web app was separated from the server side of the web app, the communication between these parts was built using web sockets which was also independently developed. The interfacing between the Arduino and the web app was done through the audio signal outputted through the headphone jack of the phone, this was built and tested separately with a different Arduino program before being integrated. I think key to developing the project was building each part of the system separately, isolating parts to getting them to work before integrating them to the whole.

Some lessons learned: divide and conquer is a strategy that works well for me, scoping the project is essential to making sure you can finish it on time, haptic feedback needs to be hard pressed to the body to be felt, audio signals from the phone can be used to control anything using fast fourier transform.

Some references:

  • en.wikipedia.org/wiki/Affective_haptics#cite_note-1
  • Dzmitry Tsetserukou, Alena Neviarouskaya. iFeel_IM!: Augmenting Emotions during Online Communication. In: IEEE Computer Graphics and Applications, IEEE, Vol. 30, No. 5, September/October 2010, pp. 72-80 (Impact factor 1.9) [PDF]
  • Chris Harrison, Haakon Faste. Implications of Location and Touch for On-Body Projected Interfaces. Proc. Designing Interactive Systems, 2014, pp. 543-552.
 

teletickle4

teletickle3

teletickle2

teletickle1

Teletickle Concept Video

Assignment,Final Project — alanhp @ 1:59 pm

password: teletickle

Project 02 – Spy Device – iSpyLenny

Assignment,Submission — alanhp @ 4:19 pm

The password is: ispylenny

Screen Shot 2014-10-03 at 4.15.37 PM


Screen Shot 2014-10-03 at 4.16.11 PM

Screen Shot 2014-10-03 at 4.17.09 PM

Screen Shot 2014-10-03 at 4.17.32 PM

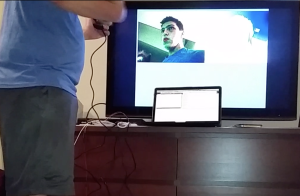
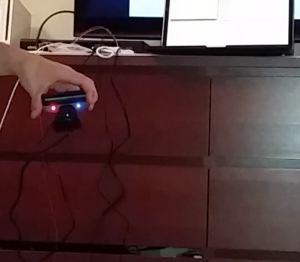
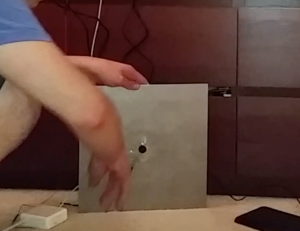
Concept: iSpyLenny is a remote dog monitor to spy / see my dog who is in South America while I am in the US. A pressure sensor sits below his bed and senses when he stands on it. When this happens, a picture of him is taken by the PS3 Eye webcam which sits next to the bed. This Picture is then saved on the RaspberryPi and uploaded to Dropbox from the device. Once the photo is uploaded, an IFTTT block is activated and a notification is sent to my phone with a link to the picture.

The process for getting this to work was a lot harder than I expected. The simplest part was to get video capturing working using the built in functionality in openFrameworks. The more complicated part for me was with the wiringPi and with the uploading images to Dropbox. The wiringPi part is technically very simple but I had a big misunderstanding of current flow and of the way resistances worked. Once I got help on that from Jake it wasn’t hard. The other part that was hard was the Dropbox uploader, in particular what I found the hardest is understanding how to locate from a terminal command all of the files I needed, so using file paths for where the script was, for the location of the image on the RaspberryPi and for the location of the Dropbox folder. One issue which I ran at the end when combining both the picture taking and the wiringPi is that the picture being taken was just grey, even though I was using the exact same code from the working file, I think it had something to do with the way the project was created and the addOns and settings made when creating it. I tried a couple of different ways of solving this but after two hours it seemed like it wasn’t justified and I just decided to leave it.

Some lessons learned:

  • Terminal commands can be run from openFrameworks code so you can essentially do anything outside of openFrameworks using openFrameworks.
  • Current flows to where its easier for it to flow, a resistor will make it harder for the current to flow in that direction.
  • File paths… ../ go back one directory folder1/folder2/folder3 go to folder 3… ../../../folder1 go back three directories and then enter folder1.
  • There are some problems which are probably not worth solving, i.e. when the returns are really tiny compared to the effort you’ll dedicate
  • IFTTT blocks run every five minutes.


Precedent Analysis 2

Precedent Analysis,Uncategorized — alanhp @ 11:24 pm

For my final project, I am interested in working with the idea of serendipity and the kinds of interactions that can be built around this concept. Because of the sensors we have access to both in our cell-phones and in the prototyping tools we are using (RPi and Arduino) the opportunities for facilitating happy accidents opens up. We can use sensors to determine where people are, what they are doing, how active they are… We can connect with each other’s devices and exchange these data and based on it take actions. So I want to focus on these data, the interactions between devices and the way that serendipity can be prompted by them. Some examples I am looking at from different fields:

From Industry – Wakie, a social alarm clock: You set a time you want to wake up and when the time comes,  some random person logged in the app who wants to wake someone up at the time you set will call you from the app. It works the other way too, anytime you sign into the app, it will tell you how many people would like to wake up around the World and you can just click on “wake someone up”

From Art – Serendipity is a project developed by Kyle McDonald while in residency in Spotify. The project detects when two strangers in the world click on play at the same exact time on a song on Spotify and then shows the locations on a map. About once a second the song being shown changes to show a new song simultaneously started in two places around the World.

From Academia – 20 Day Stranger: A project by the MIT Media Playful Systems Group, for a period of 20 days, it connected pairs of strangers in the world and had them share their day to day experience with each other.

Potential tech to emulate or use:

Bluetooth Shields

Estimote Beacons estimote.com/

OSC for data

GPS tracking?

How to Upload Image From RaspberryPi (RPi) to Dropbox using OpenFrameworks (OFx)

Reference,Software — alanhp @ 8:11 pm

Okay! here is the explanation, hopefully its not super hard to get it working.

Link to explanation with cool colored text: docs.google.com/document/d/1iopRcz5xk_z5ZRB-2PiaK7pi0I-P3qWJQp5L2xNMhjE/pub

For the instructions by the creator of Dropbox-Uploader go here github.com/andreafabrizi/Dropbox-Uploader, these are not specific to the RaspberryPi and OpenFrameworks, they are meant to be for all environments thus they may be harder to use specifically for our case.

Instructions:

1) get the Dropbox Uploader software from github. To do this the full instructions are at (github.com/andreafabrizi/Dropbox-Uploader) but the simplest method is to connect your RPi and from the home directory (which is the one you should be at by default when you connect your RPi) type on the terminal the following command:
git clone github.com/andreafabrizi/Dropbox-Uploader/

2) Then move to the directory where Dropbox-Uploader is (which should just mean you have to type cd Dropbox-Uploader) and in it you want to give the right permissions to the script by typing the following command (you may have to play a little with the +x option, it gave me some trouble. I think you can say chmod help and it will give you a list of options):
chmod +x dropbox_uploader.sh

3) Then you want to run the script which will guide you through some configuration options. To run the script, the command should be:
./dropbox_uploader.sh

4) One of the configuration options is whether you want your app to have access to all of your dropbox or just to a specific folder, I said just to a specific folder which I think makes things easier to control. The rest of the instructions are based on the assumption that you are choosing that option. You should create a folder in the Apps folder in your dropbox, I think you should have one by default, you should be able to create a folder on this dropbox for developers url www.dropbox.com/developers/apps

5) Switch to your openFrameworks app directory i.e. opt/openFrameworks/apps/myApps/myCoolApp Now you can do the cool stuff. The thing I really liked about how this integrated is that my actual interaction with dropbox takes only one line on the code. I save the file I want to upload on the RPi and then I just get it from the directory where it is at and save it to dropbox.

6) So now, wherever in your app you want to upload your file to dropbox you will place that one line of code mentioned on the previous step. I put the line right after saving the image file to my raspberry pi (for which I used the image saving example on the examples/graphics folder for openFrameworks) The line is basically going to have the form system(“command that we will specify”). What will basically happen is that whatever is between the quotes will be executed from the command line. We are momentarily leaving openFrameworks and running something from the command line. The specific line for uploading is going to look something like this: system(“../../../../../home/pi/Dropbox-Uploader/dropbox_uploader.sh upload ../bin/data/uploadFile.png uploadFile.png”)

Once that is done, your file should get uploaded to Dropbox… but it usually doesn’t happen on the first try, I had to play a lot with the location paths for all the files. I am going to explain in a little more detail each part of the quoted command so that hopefully getting the command just right is easy. So…

../../../../../home/pi/Dropbox-Uploader/dropbox_uploader.sh this is the path for where the dropbox_uploader.sh file is in relation to the directory where the app home is. ../../../../../ with this we are going up five directories, so basically to the terminal right before we enter the opt folder. Then from this directory we want to go to the directory /home/pi/Dropbox-Uploader/ where the dropbox uploader file is and here we run the script dropbox_uploader.sh

upload this says that from the dropbox uploader we want to use the upload functionality.

../bin/data/uploadFile.png and what we want to upload is the file called uploadFile.png which is located in the folder bin/data to which we get access once we go up one directory ../ from the src folder where our compiled code is (I think).

And then since we configured our app to have access to one specific dropbox folder, we don’t need to specify the directory where we are saving in dropbox and instead can just type the name we want the file to have in dropbox uploadFile.png.

that’s it.

Project 1 – The Bird AntiFeeder

Project01,Uncategorized — alanhp @ 11:43 pm

2014-09-07 22.07.22

2014-09-07 22.09.01

2014-09-07 22.08.29

2014-09-07 22.10.07

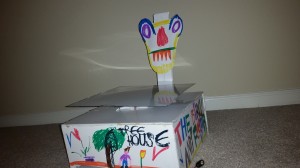
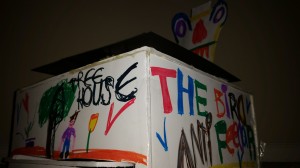
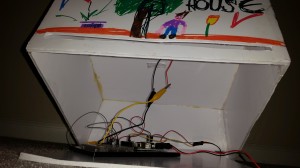
The bird antifeeder is a high-tech system that prevents birds from eating your food. You can see the above video for a demo of the system in action… The high-tech part is not true though, actually the bird antifeeder is a playful work that resulted from a combination of a short timeframe, a limited availability of resources (laser cutters on campus) and a need to quickly familiarize myself with a technology (piezo contact microphones).

I started the project knowing only that I had to sense something using a microphone and that I had to respond to what I sensed in some non-screen based way. Initially I wanted to sense ants walking on a surface and using this information I wanted to send a notification or give some kind of signal for people to become aware of ants walking on a surface which in itself is interesting because it is something we are rarely paying attention to. This was inspired by the much better and thoughtful projects by Prof. Ali Momeni. Again, because of the short timeline, for me this project was much more focused on learning how to sense using a contact microphone than it was about developing a strong concept.

Quickly, it became evident that sensing the walk of ants would be quite challenging with the technology I had, particularly because of the limited strength of the vibrations generated by ants walking which I intended to sense with the contact microphone. Despite having found a metallic material with nice vibrating properties, the task was out of the scope of the project because of how much more thought and testing would have been necessary.

With this information, I re-scoped the project to a much more manageable objective: to sense the vibrations generated by birds landing on a surface and to respond to this vibration in some way. This decision was taken after talking with Jake on the weekend before the due date for the project. After figuring out the amplitude sensing thresholds and getting a servo motor working, I set on to build an encasing in which all the components could be placed. The laser cutters around campus where all booked and the project was due the day after which is when I had to go back to the famous “its better done than perfect” which I agree sometimes with.

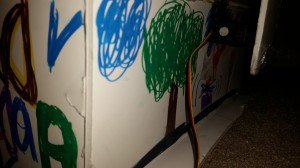
My arts and crafts skills are not super great though so as I continued to make my project’s box, it looked more and more like a ten year old had made it. With little time remaining and the idea that I wanted the project to feel like a unified and deliberate work, I embraced the child-like aesthetic all the way and decorated the project so that it looked like a cool addition to a kid’s treehouse.

That is the story of the bird antifeeder, a high-tech system to scare away the birds who want to eat your food. Lessons learned, sometimes it is indeed better done than perfect, humor is always good, follow intuition sometimes, if you can’t get what you need figure out how to make it work with what you got, keep in mind the scope of each project.

puts down mic…


NOTE: images are HD but for some reason not displaying as such. Click on each to see high-res.

Precedent Analysis 1

Precedent Analysis,Uncategorized — alanhp @ 10:56 pm

plis/replis is an 2012 installation by CMU professor Ali Momeni and his collaborator Robin Meier. It consists of a giant (10 x 10 x 12 m) origami inspired and digitally fabricated structure suspended inside an underground cave. The structure serves as a large speaker inside the space. On the focal point of the structure, a glass platform holds a vessel of champagne. Inside this vessel, there is a microphone that captures the effervescent sounds of the champagne. These then are run through software that translates them into a sound environment which continually evolves in response to the effervescent activity. The folds in the structure serve as metaphor for the relationship between mind and matter. The project in part aims to amplify the metaphors and experience of champagne. I like this project in part because of how it transforms the space in which it is at taking advantage of the qualities of the space itself, the size and its relative isolation due to it being an underground cave. I also like Prof. Momeni’s sound projects as they make the small sounds that we don’t pay attention to, hypnotic and grand.

Tap Sense is a technology developed by CMU professor Chris Harrison (paper published UIST 2011). It allows touch screen devices to detect different types of touch through the help of the different sounds made when the finger touches the screen. Our fingers are extremely complex and functional, yet touch screens today interpret touch in a single way. Tap Sense takes the hardware that is in place and uses it to sense in a novel way, in particular, it uses sound to understand touch. The creative way of interpreting information is what is most appealing about this project to me. Taking existing stimuli from the world and interpreting in novel ways is something I want to borrow from this project.

Blinkdrink is a commercial product that uses the microphone in the smartphone to react to sound. It is made by Brad Simpson who is currently at IDEO. The way microphones are used is interesting to me because of the social aspect. If you are by yourself and you activate your Blinkdrink app with a glass on top of it, you will see how it responds to the sound, more interestingly to music. If you are with friends, and each friend has their glass on top of their phone, every phone responds differently (at least based on the project video). Then it becomes more of a game around arranging in different ways the sound.

Background — Alan Herman

Background,Uncategorized — alanhp @ 10:45 pm

Hi! my name is Alan. I graduated last year from undergrad at CMU. I am originally from Venezuela. Now I am doing the MHCI program.

This work is licensed under a Creative Commons Attribution-Noncommercial-Share Alike 3.0 Unported License.
(c) 2025 Making Things Interactive | powered by WordPress with Barecity